So, 1st game of the campaign that I’ve played was
my Nomad’s Kill Team against Graham’s Yu Jing Kill Team.
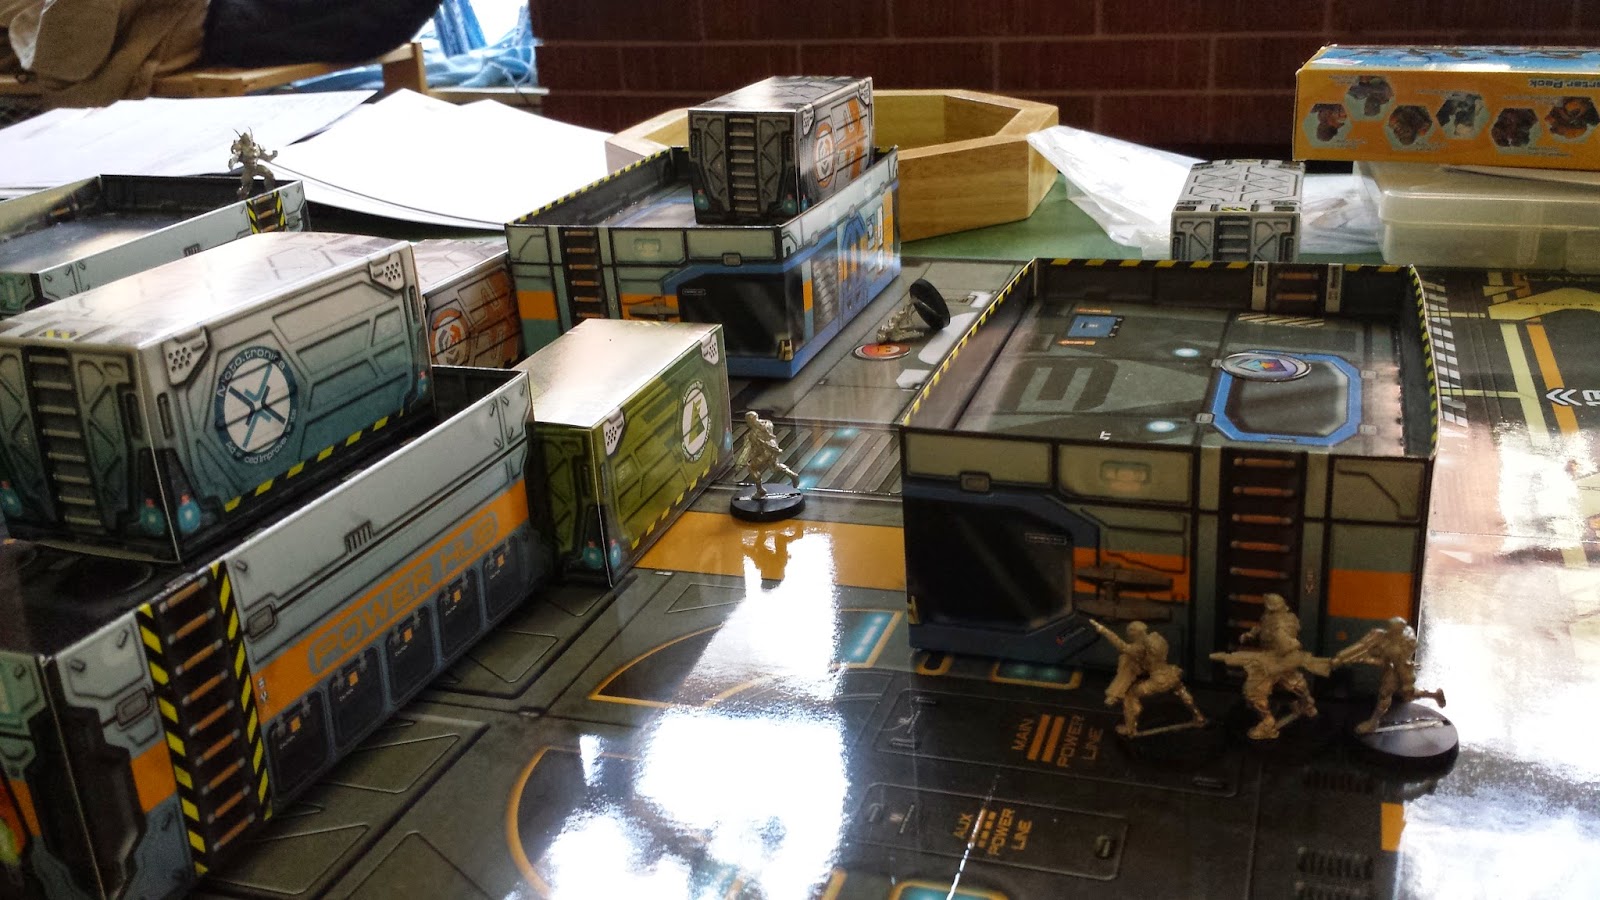
Using the basic terrain that came with Operation: Icestorm (a
nice size for smaller games), we rolled on the campaign tales and discovered
the following conditions and missions:
Setup:
Cease-fire
Cease-fire
Factions are in a state of cease-fire and will be penalised
if they open fire first. Being attacked (successfully or not), or Discovering
an enemy Camo marker or Impersonator allows a faction to initiate hostilities
without penalty.
Commencing hostilities under any condition but those above
incurs that Player an automatic loss of 1 VP (Victory Point).
Factions setup as per normal within 8” of the table
centre(line).
Conditions/Restrictions:
Military
No restriction on troop types.
Mission:
Joint Training
Exercise
This is a joint-wargame between the factions as a simulation
exercise.
The KT’s are using the mission to train, either new recruits
or new techniques. The use of non-lethal force is essential. Setup and
Conditions apply as part of the simulation. Additionally, mercenaries cannot be
fielded.
Time:
At the end of turn 3, and every other turn, the game ends on an
escalating-roll of 4+ (3+ at end of turn 3, 2+ at end of turn 4, automatic at
end of turn 5).
Endgame:
The game also ends when one faction is Unconscious or eliminated.
VPs: +1 Per enemy marker Unconscious at game end
-1 Per enemy marker
killed (does not include mercenaries).
++++++++++++++++++++++++++++++++++++++++++++++++++
Yu Jing Kill Team:
- Zhanshi with Combi Rifle, Pistol & Knife (Lieutenant – announced after game)
- Zhanshi with Combi Rifle, Pistol & Knife
- Zhanshi with Combi Rifle, Pistol & Knife
- Domaru Butai with Boarding Shotgun, E/M Grenades, Pistol, AP CCW
- Raiden Seibutai with Heavy Rocket Launcher, Pistol, Knife
On the Yu Jing’s Table side, the Raiden & a Zhanshi set
up on the right corner of the Maintenance Module on their deployment zone. Another Zhanshi hid around the right side of
the same module. The last Zhanshi and
the Domaru hid behind a Cargo Container on the left side of the deployment
zone.

Nomads on Left, Yu Jing on the Right
Nomads Kill Team:
- Mobile Brigada with Multi Rifle & Light Flame Thrower,
Pistol & Knife
(Lieutenant – announced after game) - Reverend Healer with Combi Rifle, Nanopulsar, Pistol & Exp CCW
- Corregidor Alguaciles with Combi Rifle, Pistol & Knife
- Corregidor Alguaciles with Combi Rifle, Pistol & Knife
On the Nomad’s side, an Alguaciles hid behind the corner, on
the left of the Power Hub. The Mobile
Brigada went on top of the Power Hub for best line-of-sight. Behind the Cargo Container, the last
Alguaciles set up behind the left corner and the Healer on the right corner.

Yu Jing on the Left, Nomads on the Right
The Mission Begins!
Turn 1:
Yu Jing took first turn.
Yu Jing took first turn.
The Zhanshi on the right corner of the Management Module ran
forward, staying behind the crates in the center of the battle zone. A second Zhanshi ran from behind the Cargo
Container on the left forward, towards the center. As he came around the corner, one of the
Alguaciles spotted him and fired. The
shot hit and wounded the Zhanshi, dropping him behind the Cargo Containers and gaining
a point for the Nomads. Having shot
first, the Nomads lost a point for breaking the Cease Fire!

Nomad Alguaciles Takes Down a Yu Jing Zhanshi
The Domaru, having heard the shot, took a chance and ran
from the Cargo Container to the Maintenance Module. Once more, the Alguaciles took the shot and
hit the Domaru. Fortunately for the Domaru,
his armour saved him and he made it successfully behind the Maintenance
Module. Using another order, he moved to
the Left Corner of the Maintenance Module, as did the last Zhanshi.
Yu Jing - End Of Turn 1
Nomads:
The Reverend Healer moved from behind the Cargo Container to
peek around the corner of the Power Hub on her left, using 2 orders in the process. The Alguaciles on the far left also used 2
orders to move forward, behind the Cargo Containers in the centre.

Nomads - End Of Turn 1
Turn 2:
Yu Jing:
Having lost a Zhanshi last turn, Yu Jing was down to 4
orders. The Domaru ran forward from the
Management Module to behind the Power Hub on their Left. The Raiden climbed the ladder on the side of
the Maintenance Module to the top. The
Mobile Brigada spotted the movement and fired back, but missed. The Raiden fired back with his Rocket
Launcher and hit the Brigada, but the Brigada’s thick armour and cover from the
parapet prevented a wound!

Raiden Fires Missiles at Brigada Mobile
The Raiden took a 2nd order and moved to the lip
of the Maintenance Module and fired his Rocket launcher again at the Brigada,
hitting him once more. Again, the
combination of partial cover and armour saved the Brigada from taking a wound!
The Domaru used up the last order to run around the outside
edge of the Power Hub, not quite making it to the opposite corner.
Nomads:
The Mobile Brigada used an order to fire a burst at the
Raiden again, the Raiden fired back in reaction. This time, the Brigada managed to hit the
Raiden though he failed to wound the Raiden.
The Raiden lost his nerve and dropped prone, hiding behind the parapet.

Mobile Brigada Shoots at the Raiden Seibutai
The Reverend Healer, using 2 orders, charged the Domaru! (In ??? years of playing Infinity, I think
this is the 1st time I actually charged into CC.) (If I’d known how good the Domaru was in CC,
I probably wouldn’t have!) In spite of
the crazy stats of the Domaru, the Healer managed to land a blow with her
Explosive Close Combat Sword (?) causing 3 hits to be saved. The Domaru
managed to save 2 hits but the 3rd hit caused a wound. Using up the last Nomad Order, the Healer attacked
once more, but the Healer and the Domaru failed to hit each other (we both
rolled the same number on the D20)!

Reverend Healer & Domaru Butai Fighting!
Turn 3:
Yu Jing:
Angered, the Domaru attacked the Healer and hit, but the
Healer’s armour protected her from any damage.
The Domaru used a 2nd order to attack the Healer, but this
time the Healer struck back and killed the Domaru! (The Domaru failed 2 of 3 saves, taking away
his last wound and adding an extra – auto-killing him.) Due to the mission rules, instead of gaining 1VP,
I LOST 1 VP! I’m not supposed to kill
anyone! This took the Nomads to -1VP!
Angered, the Raiden stood up from behind the parapet and
fired his Missile Launcher at the Mobile Brigada. One missile hit, but the Brigada’s armour and
cover once more saved him. Tired of
taking missiles to the chest, the Brigada “failed” his Guts Roll and went
prone, ducked down behind the parapet.
Finally, a Zhanshi moved forward to behind the Power Hub on
the left.

End of Yu Jing's Turn 3
Nomads:
The Reverend Healer moved forward, peeking around the corner
of the Power Hub and fired a burst at the Raiden. Surprisingly, in spite of the cover and
armour, the Healer hit and wounded the Raiden!
A Zhanshi spotted and shot at the Healer as she shot, but missed.
With only 2 Zhanshi left and both hidden around the corner,
the Healer peeked around the corner and fired at both the Zhanshi, allocating 2
shots to the closest. Both face-to-face
rolls went to the Healer and both Zhanshi were hit and wounded. Sadly, the one victim took 2 hits and was
wounded twice, auto-killing him as well!
This resulted in the End of Game.
Reverend Healer Ends The Game!
Yu Jing ad failed to wound anyone – 0VP
Nomads and wounded 3 (3VP), killed 2 (-2VP) and shot first
(-1VP) – 0VP!
A DRAW?!?!?
Don't you hate it when that happens???
Nice. You got a draw even though you shot up every one.
ReplyDelete